




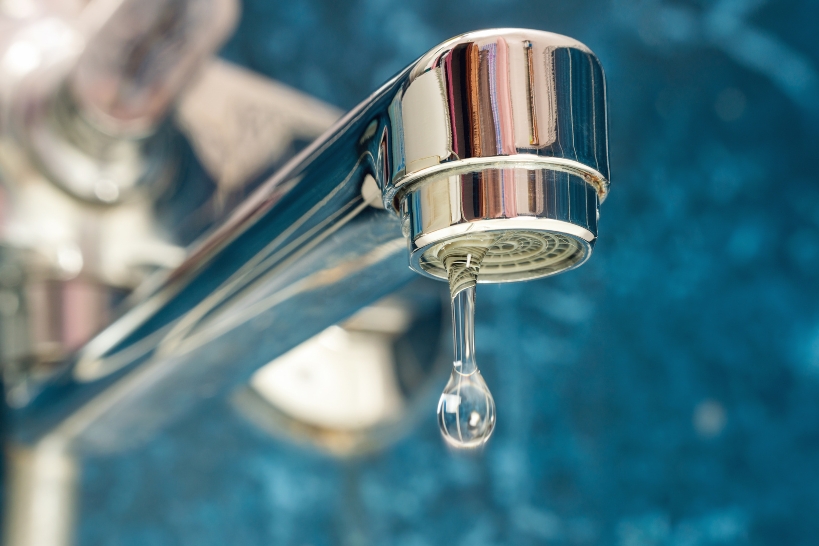
Learn how to fix a leaky faucet by identifying whether water drips from the spout, pools around the handle base, or leaks from an under-sink hose, then replacing the worn parts and verifying a watertight seal.
This repair takes roughly 30 to 90 minutes and is built for homeowners comfortable using basic hand tools on standard sink fixtures. It does not cover wall-mounted faucets, hidden supply-line leaks, or damaged shutoff valves.
Before starting, gather flat and Phillips screwdrivers, Allen keys, an adjustable wrench, needle-nose pliers, a drain stopper, replacement parts, and 100% silicone plumber’s grease. Because Central Texas hard-water scale frequently seizes cartridges, keep an optional cartridge puller on hand.
A persistent drip wastes hundreds of gallons of water each month, so pinpoint your exact leak symptom before taking anything apart.
Diagnose the Leak and Identify Your Faucet Type
Before you can fix a leaky faucet, identify where the water originates to avoid buying incorrect replacement parts.
Observe the leak pattern:
| Leak Pattern | What It Indicates |
|---|---|
| Spout drip while off | Signals a failed washer, seat, cartridge, ball assembly, or ceramic disk. |
| Puddle around handle base while running | Points to worn O-rings or stem packing. |
| Cabinet water during sprayer use | Points to a compromised pull-down hose, spray head, or quick-connect fitting, not the spout. |
For two-handle faucets, pinpoint the leaking side by closing one under-sink shutoff valve at a time. If the drip stops after shutting the hot supply, replace that specific side’s internal components.
Next, identify your valve mechanism:
| Valve Mechanism | How to Identify It |
|---|---|
| Compression | Handles physically tighten down with resistance. |
| Cartridge | Handles rotate smoothly without vertical travel. |
| Ball | A single lever swivels over a rounded dome. |
| Ceramic disk | A single lever controls a wide, cylindrical cartridge. |
Snap clear photos of the faucet body, brand logos, and exposed parts before shopping for replacements.
Gather Your Tools and Source the Exact Replacement Parts
Photograph your faucet, brand logo, and handle configuration before taking anything apart.
Gather your essential tools:
- Flat-head and Phillips screwdrivers
- Allen keys and an adjustable wrench
- Pliers, clean towel, and drain rag to block the drain opening
- Masking tape to wrap wrench jaws and protect fixture finishes
- Silicone plumber’s grease (never petroleum jelly, which destroys rubber)
Match parts to your faucet type:
- Compression: Exact-size rubber washers and valve seats
- Cartridge or ceramic-disk: Model-specific replacement cartridge
- Ball faucet: Rebuild kit with springs, seats, cam washer, and ball
- Handle or base leaks: Matching nitrile O-rings
Check warranty coverage before buying. Original homeowners can often get free cartridges directly from Moen, Delta, Kohler, or Pfister under lifetime warranties. If buying locally, wait until the water is shut off, extract the old part, and carry it to the store to confirm an exact match.
Shut Off the Water Supply and Prep Your Workspace
Locate the oval handles beneath your sink and turn both hot and cold shutoff valves clockwise until fully closed. Always isolate both lines, even if only one side leaks. If you need help to shut off the water to the fixture, remember that sink valves sit directly beneath the basin rather than near the floor.
Open the faucet fully to drain residual pressure and verify that water flow stops completely. Do not proceed if a valve will not close, leaks when turned, or leaves water running.
Prep your workspace before disassembling the faucet:
- Place a stopper or towel over the drain to catch screws, clips, springs, and washers.
- Lay a second towel inside the cabinet to absorb residual water.
- Wrap masking tape over wrench jaws to protect chrome and specialty finishes.
- Arrange removed parts in removal order for easier reassembly.
Remove the Handle and Access the Valve Assembly
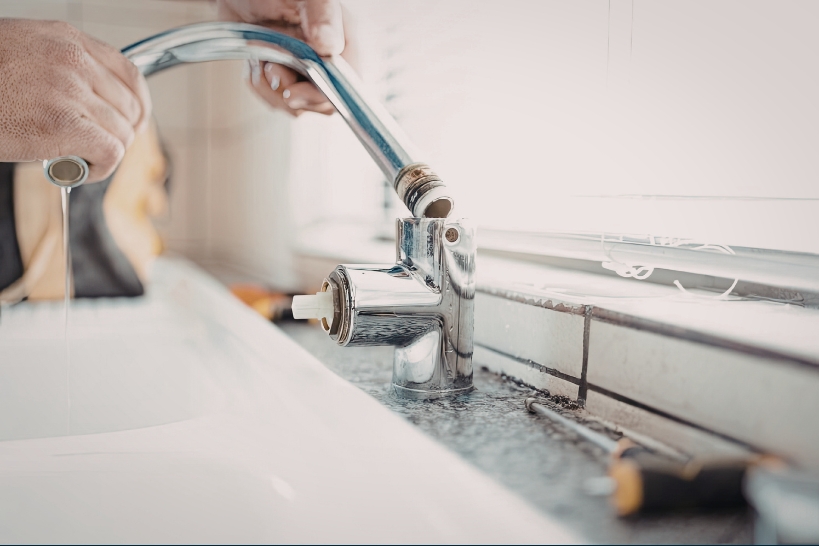
Expose internal parts carefully to protect decorative finishes:
1. Expose the fastener: Gently pry off the index cap with a thin blade, or locate the recessed Allen set screw beneath the lever.
2. Remove the handle: Loosen the screw and pull the handle straight up without striking it.
3. Remove retaining hardware: Unthread trim sleeves by hand. Loosen the brass retaining nut with an adjustable wrench, or pull the retaining clip with needle-nose pliers.
Photograph each layer during disassembly and store small hardware in a cup.
Identify the exposed valve type:
- Compression: Threaded brass stem.
- Cartridge: Brass or plastic cylinder held by a nut or clip.
- Ball: Cam washer, packing, and rotating metal ball.
- Ceramic disk: Wide composite cylinder.
Never wrench delicate trim directly or yank parts before verifying every fastener is removed. The valve assembly is now fully exposed for inspection.
Replace the Seals or Cartridge and Address Mineral Buildup
Excessive force can twist supply pipes. Follow the repair path for your faucet type:
| Faucet Type | Repair Path |
|---|---|
| Compression faucet | Remove the stem. Replace the bottom washer with an exact match, inspect the brass seat, and replace worn stem O-rings if the handle leaked. Do not overtighten the packing nut. |
| Cartridge faucet | Remove the retaining clip or nut and pull the cartridge straight out. Clean mineral buildup from the valve body, coat new O-rings with a thin film of 100% silicone plumber’s grease, and install the replacement. |
| Seized cartridge | Stop before pulling hard. Confirm the clip is removed, wrap mineral scale with a vinegar-soaked rag for 45 to 60 minutes, and use a cartridge puller braced against the valve body. Never use open flames or twist supply pipes. |
| Ceramic-disk faucet | Remove the cylinder, inspect and replace the neoprene seals, and install a replacement disk cartridge if damaged. Restore water slowly later to prevent pressure shock. |
Stop the repair and call a professional if the cartridge stem fractures, the valve body is scarred, the seat is heavily corroded, or the cartridge resists a puller.
Rebuild a Ball Faucet or Repair a Pull-Down Spray Hose
Choose the repair path matching your fixture:
- Ball faucet: Remove the cap, cam, cam washer, and ball. Use needle-nose pliers to extract the inlet seals and springs. Insert new springs with the wide base down, then seat the matching seals and ball. Align the cam-washer tab into the body notch. Thread the cap and use a ball-faucet spanner to tighten the adjustment ring just enough to stop leaks while keeping handle movement smooth. Do not cross-thread or force the ring.
- Pull-down spray hose: With the water supply off, check under the sink for hose cracks or friction wear near the counterweight. Inspect the quick-connect O-ring for damage and push the fitting until it clicks fully into place. Replace damaged hoses, adapters, or spray heads using manufacturer-specific parts.
Once your parts are in place, reassemble carefully. The next step requires slow testing rather than immediately restoring full water pressure.
Reassemble the Faucet and Verify the Repair
As the final step in how to fix a leaky faucet, reinstall components in reverse order. Confirm cartridges, stems, seals, and clips seat flush. Tighten retaining nuts snugly, but do not overtighten plastic parts or packing nuts, which distorts rubber seals.
Account for all screws, clips, and springs before removing your drain cover, then reinstall the handle and decorative cap.
Turn shutoff valves back on slowly while watching beneath the sink. Inspect supply connections, quick-connects, and the faucet body for moisture before running water.
Run hot and cold water, move the handle through its full range, and test the sprayer. Verify normal handle travel, stable water pressure, no handle seepage, zero under-sink leakage, and no spout drip.
If recurring scale causes stiff handles or cartridge failures, understanding what causes low water pressure can help you identify mineral buildup before it damages fixtures.
When to Stop and Call a Professional Plumber

Knowing when to put tools down prevents a basic drip from turning into costly water damage. Stop the repair and call a plumber if you run into these red flags:
| Red Flag | When to Stop and Call a Professional Plumber |
|---|---|
| Seized or fragile connections | Stop immediately if an under-sink shutoff valve refuses to turn, supply lines twist when wrenching, or the cartridge breaks off. Deeply pitted valve seats and persistent leaks after installing exact-match parts also require fixture replacement. |
| Hidden leaks and structural damage | Call for help if water is leaking inside cabinets or walls, the faucet body is cracked, or you observe severe corrosion and fluctuating water pressure throughout your home. |
| Recurring mineral scale | Central Texas hard water frequently welds brass and cartridge assemblies together. A whole-home water conditioning system cannot repair an already failed valve, but it protects replacement fixtures from rapid buildup. |
When DIY is no longer the safe path forward, SALT’s licensed plumbers handle it from there. Our team offers professional leaky faucet repair and installation across Austin and all of Central Texas, with upfront pricing and clear options before any work begins.
Call Now: (512) 956-7842Frequently Asked Questions About Fixing a Leaky Faucet
Why is my faucet dripping when it is turned off?
A drip from the spout indicates a failing internal shutoff seal, not a dirty aerator. Depending on fixture design, water bypasses a worn rubber washer, a degraded cartridge assembly, worn ball springs and seals, or a cracked ceramic disk.
How do I know whether to replace a washer or a cartridge?
Your faucet type determines the needed parts. Compression faucets with handles that screw down tightly use replaceable rubber washers and brass seats. Cartridge and ceramic-disk fixtures do not use standard washers and require an exact manufacturer-specific replacement unit.
Can I use Vaseline or petroleum jelly on faucet O-rings?
No. Petroleum jelly breaks down nitrile and neoprene rubber, causing seals to swell, soften, and fail. Always use a thin coat of 100 percent silicone plumber’s grease formulated for potable water systems.
What should I do if the faucet cartridge is stuck?
Double-check that all retaining clips and nuts are removed. Soak the valve body in white vinegar for an hour to dissolve mineral scale, then use a dedicated cartridge puller. Stop if the cartridge fractures or the copper lines begin twisting.
Should I repair or replace an old faucet?
Repair the fixture if a replacement cartridge or washer kit solves the issue, particularly if parts are covered under manufacturer warranty. Replace the fixture if the brass valve seat is heavily pitted or corroded. If you choose to upgrade, explore the best luxury bathroom faucet brands for lasting performance.
Can I fix this myself, or should I hire a plumber?
Replacing basic seals or dropping in a fresh cartridge is a manageable DIY job with standard tools. If shutoff valves freeze, internal components break off, or leaks persist after reassembly, reach out to our licensed plumbing team. We serve Austin, Pflugerville, Cedar Park, and all of Central Texas with same-day availability and upfront pricing.
For a full list of plumbing services we offer across Central Texas, visit our plumbing services page.
Schedule Plumbing Service